28 June 2010

Getting A Great Collar

Let's face it..collars can be a pain in the @$$ not only to attach, but also to shape. I finished my vintage blouse today that has an attached collar, and thought some of you may like to see some tips and tricks. This particular collar isn't exactly the best to demonstrate with, but I supplemented with some examples.

I would say that one of the most important things to keep in mind when sewing a collar is what I consider to be one of the golden rules of sewing: reduce bulk whenever possible!

Normally I use an overlocker on most unfinished seams, but collars are a rare exception for me. Honestly, it isn't really needed and it can end up leaving a little bulk or showing through the fabric (if it is light colored), especially in the corners.

I like to trim the seam allowance and then make overlapping "layers" so that the bulk is spread out:


Here you can see it incorporated on both edges on the inside:


Unlike this collar, many incorporate interfacing to give stiffness and sharpness. I follow the same concept, except I cut out as much of the interfacing in the seam allowance as possible because it is not going to affect the strength of the seam (this works for both sew-in and fusible interfacings):


Another prominent place to reduce bulk is at the shoulder seams. See all that shoulder seam allowance? No need for it!


So now that we've taken care of the sides, let's talk about corners. This probably isn't anything new to you, but the best way to reduce bulk at the corners is to cut across the seam allowance at an angle:


This seam could use more trimming, but when doing so cut carefully and conservatively. If you cut too close to the corner seam (or any seam really), it can pull apart when turning out.

Now that we've reduced some bulk, how do you get that elusive knife-edge?

This can be quite difficult at times, especially when you can't press open the entire seam. This is a time where good pressing skills are essential, and unfortunately that really only comes with practice. There are however tools that can be incredibly useful for this, such as a tailor's ham or seam roll for curved seams, or a point presser & clapper for hard to reach areas. If you're in a bind or simply don't have one, never fear; the straight edge of a butter knife can work just as well (although it may take some more maneuvering).

Are you still with me? I know this is a long post, but it's almost over! Just one more thing I want to cover briefly: collar attachement.

This can often be the most frustrating part because sometimes you are attaching a straight piece of fabric to a curved edge (like this one).


As you can see from the photo above, the collar edge won't always lay perfectly against the neck edge. This is where ease becomes a huge factor in making it work. Unfortunately easing is another one of those things that comes with practice, so if you have trouble with easing don't give up!! The best way to success is to line up your notches, markings, and edges and pin them (vertically) in place, and then work from those points.

Almost done!! Now that the collar is in place, it's time once again for some good pressing. Press the seam up into the collar, and work out any wrinkles or bunching with your fingers and steam.


And there you have it..a flat, sharp, smooth , happy collar!


Although it's finished I want to wait and show it modeled..it really doesn't have a lot of hanger appeal. Pics tomorrow! :)

24 June 2010

Eye Candy

I didn't have any great vintage pattern finds this week, but I did come across this fun champagne brooch!


I bought it from a vintage store but I don't think it is "vintage" in the true sense..the finish and diamonte on it appears too new, so I'm guessing it is a modern retro piece. I'm not bothered though because I absolutely love it and think it will look great on a 50's evening jacket!


I quite like the idea of brooches..do any of you wear/collect them?

22 June 2010

Some Notes on Pattern Alterations

After a disappointing week of sewing, I did manage to get a project started this weekend..I figured it was time to get a vintage pattern in the mix so I started a simple 50's bow-tie blouse from this patern (view A):


This is a size 32 bust so I knew it was going to require some alterations to fit my 36" bust, but because all of the shaping darts are in the waist area I knew it wouldn't require a whole lot of fiddling. After making a toile of the pattern as it was, my hunch was in fact correct. So how to alter it? I saw on Friday that Gertie did a post about resizing vintage patterns, but as you can see from the picture below I didn't want to just add width to the side seams becuase the shape is so subtle that I didn't want to loose it..so that left only one alternative..slashing! Disclaimer: I'm not claiming to be a pattern cutting expert here, but I do have some knowledge and experience, so I'll show what worked for me.


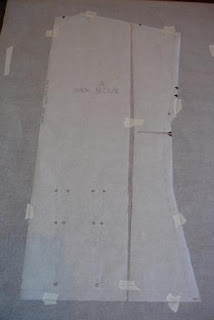
This picture is of the front and back blouse pieces that I traced from the originals. The red lines indicate where I plan to slash the pattern. I made a horizontal slash in the bust area and the vertical line will be a slash to add width to the waist measurement. The original waist was fine but a bit too tight for my liking, so I decided to add just a bit so that I could feel comfortable wearing it with lower-waisted jeans if desired.

Here are the pieces after slashing. Front:

and back:


It is probably hard to tell from the pictures what I did so I will explain as best I can!

This is typically a way to add to the bustline without adding to the waist or shoulder measurements. You make the slashes as shown, and then push the pattern outwards from the point where the 2 slashes almost meet. This makes the horizontal slash expand, which lengthens the side seams and keeps the shape in proportion with the expanding bust measurement. If you don't want to add to the wasit measurement, you simply match the slash up the bottom. If like me you want to add some width, simply spread at the bottom and set at the desired measurement. I did the horizontal slash at the underarm notch simply for reference, and made it 6cm long on both pieces. I made the vertical slash .5cm away from the end of the horizontal slash and checked to make sure it was not going through the waist darts. The vertical slash is essentially what is adding width to the bust as well as the waist. In order to do this without altering the shoulder, I cut the slash right up to the edge of the paper without actually cutting it apart. Then I adjusted the spread to add 0.8cm to the bust and 0.25 to the waist. This resulted in adding 3.2cm to the bustline and 1cm to the waist (explanation below). Note: Unless you are very confident in your skills, I recommend that you alter all pieces to the same measurements, otherwise they will not match up!

Next I traced new pattern pieces from the altered ones, and used those to cut out the fabric.

I admit that pattern cutting can be frustrating, but it is one of those things that will get easier with practice and experimentation. Don't give up if it doesn't always work, sometimes you have to go through several toiles before you get it right. And remember, a little goes a long way! Whatever measurement you add to the pattern you are really adding 4x that (left front, right front, left back, right back)..for example if you add 1cm to the wasit on the pattern you will have added 4cm to the garment (1cm x 4). Measure whenever possible, but sometimes you just have to guess (and that can often be the best way to learn)!

20 June 2010

The Perfect Knit Dress?

Well so much for my "week of sewing and stash-bustin"..I took 3 days off work to finish some projects and start new ones, but ended up going in on Thursday and Tuesday was spent running errands and cleaning..so not much got done. Unfortunately my party dress for Anna's birthday was not done in time (due to some fitting issues which I will blog about later), but I did finish McCall's 5752 - "The Perfect Knit Dress" on Monday (it was horrible weather all last week so I couldn't get a picture until today!)


I'm not going to post a full review, but I do think it is noteworthy. This is a really simple dress to make, and it is soo comfortable! The A-line skirt is also great for showing off prints (the placement of mine was unintentional I swear!)

One thing I would like to point out:

I made a size 10 toile in a 100% cotton knit, and it fit me perfectly. However, my dress fabric is 92% modal and 8% spandex. I decided to stay with the 10 instead of relying on the stretch of the spandex to fit into a size 8..it probably would have looked alright but I think spandex helps with the drape of the garment more than the fit, and I also didn't want the print to appear distorted from stretching.

I didn't have to make any alterations or changes, except I pressed open all of the side seams and used a stretch stitch for the whole garment instead of just on the skirt like the instructions say. Would I make it again? I'm not sure yet because I'm not a fan of the midriff section.. it is composed of 3 layers: the rouching pannel set on top of a backing pannel, and a self-lined pannel on the inside (see below).

Although the inside lining pannel is aesthetically pleasing, it helps make for bulky seams along the midsection (which is the WORST place to have them!) because you have 3 layers in front and 3 in back. I think if I made this again, I would leave off the rouching pannels because I don't think they are flattering to my figure. If you are paranoid about bulkyness or don't care how the inside looks you could leave off the lining pannel, or even the lining and rouching.

Overall I'm really pleased with it and know it will get a lot of use. I have some other jersey dress patterns that I want to try next, but I'm sure this is one I will come back to!

09 June 2010

And The Winner Is....

First of all I just want to say thank you to everyone for all of the great feedback, it has been a very tough decision! I narrowed it down to Butterick 5032, Simplicity 4760 (vintage), and Vogue 1182. I really like the vintage Simplicity but decided not to do it out of pure laziness because it is a 30" bust and I am a 34-36" (depending on the bra, LOL) and I don't feel like taking the time to re-scale it..I am trying really hard to bust through my stash and I have a huge pattern que!

So then it was down to two..and I decided on Butterick 5032!
There are two reasons why:
1. Lora at Sew Red Hot made it, and it looks great!
2. I found the PERFECT fabric and headpiece to match that will look stunning with this style!
Honestly, I really was going to go with Vogue 1182 because I think it will look fab with a huge hat, but then I got thinking about fabric..silk was out (sweat and silk don't mix well if it is a hot day), and I couldn't find any cottons or linens that seemed right. And then I accidentally found the cotton print that just screamed B5032 and made up my mind right there and then..I'm not going to show you a picture of it yet because I want the entire ensemble to be a suprise! I did find this along the way and thought it would be fun with a headpiece made of matching ribbons, but I'm not keen on the colour scheme and don't want anything too crazy..this isn't Royal Asocot!


It has been perfect sewing weather this week (cold and rainy) combined with a husband across the Atlantic, so I have gotten a lot of sewing done! I've almost finished a dress I'm working on and have started another that I want to wear on Saturday for Anna's birthday..unfortunately I probably won't get pictures up until next week because my personal photographer is away on business.

Happy sewing lovelies!

07 June 2010

Now I Undserstand Why the Selfish Seamstress is So Selfish

I learned some valuable lessons this weekend.

1. I hate doing alterations.
2. I hate doing alterations for other people.
3. Don't feel bad telling someone you don't do alterations.
4. Sometimes, you just have to swallow your pride and admit you can't do it.

So how did I come to learn all of this? WELL...

One day I was approached by a co-worker who said, I know you sew, and I was wondering if you may be able to help me out. (I bet most of you can guess where this is going..but in my defense, this was the first time anyone ever said this to me so the abandon ship alarms weren't going off in my head). I eagerly listened and she asked if I could hem her daughter's baptism dress and add some cap sleeves, because it was going to cost her more than the dress was worth if she had it professionally done. Sounds simple enough right? My thought exactly so I told her to bring it over and I'd have a look. Fast forward to the next day, and WHAM! I was hit by a white polyester child-size version of Belle's ballgown from Beauty and the Beast. I looked at it and although I had serious reservations I thought I could have a go..and hey, I wanted to help her out..so I accepted. I won't bore you with the details, but honestly it turned into a disaster..mainly because I was afraid I'd ruin it and I didn't want to cut and pick apart anything, so I wasn't doing it properly. After shedding much blood, sweat, and tears I finally gave up because I wasn't enjoying it, I wasn't happy with it, and I didn't want to give her dress back looking like shit rubbish..and let me say, lesson #4 was the hardest (because I am a VERY pedantic and persistent sewer). From now on, I only have one client..ME!

*sigh*...well, at least now I can go back to focusing on my own projects! I did get some stash-bustin' done today so I'm feeling better.

This dress will never look the same.

06 June 2010

The Magazine Actually Worth a Fiver

#110
Have you picked up the June issue of Burda Style magazine? If not go get it! I got mine today, and it is packed FULL of stylish patterns that are perfect for summer. My must have? #116 shorts in silk duchesse satin..I'm already looking for fabric! (I did some major stash-bustin' today so I don't feel as bad about buying new fabric ;) ) and I think #110 (with some adjustments) is going to be perfect for my couture flower/zebra print silk chiffon!

#116 Shorts

04 June 2010

New Liberty Prints!

Liberty has got new prints out!! They have released some prints from their archives for their new Sixties Print Collection. Here's a taste:

And my two faves:


Unfortunately these will set you back more than most other Liberty prints..they're priced at £24.95/metre (yikes!) but so worth it..in my opinion Liberty makes THE best cottons. Check out the whole range at Liberty.co.uk.

03 June 2010

I Need Your Help!!

Here's the situation:

It's my friend Elizabeth's birthday in July and she has decided to celebrate at York Racecouse..so fab! This means I need a great ensemble that is fashionable,classic, and not OTT..but I can't decide what I want to make! I do know that I want a slim silhouette because I want a mid to large size head piece. (And it may be a good idea to have a wrap or bolero in case it is a cool day). I need to get started soon because not only is it fast approaching, but I will have to commission a milliner for my matching headwear.

My original idea, Butterick 5032 (view with cummerbund sash):


Then I remembered this pattern I got with a magazine, and was actually planning on wearing it to Ladies Day at Royal Ascot (the bolero w/bow is removable and the dress is a simple strapless):


And then there's this vintage Simplicity (look 2 - not so sure about the flaps though):


And this one! (look 1):


Or maybe I should just go posh modern, like Vogue 1182..I could see this with a big hat!


I have my heart set on doing a vintage style, but nothing feels right at the moment..so I need your feedback! What do you think of these, and any fabric suggestions? Know any patterns you would recommend? I'm open to anything!

02 June 2010

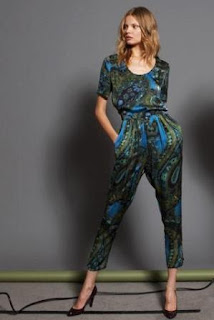
Jumpsuits and Playsuits..Hit or Miss?

I'm just wondering if anyone out there has gotten into the jumpsuit/playsuit trend that has emerged? Now I'm seeing them everywhere in stores (namely playsuits thanks to Topshop) and they seem to be popular with the young & and trendy English crowd (Although I love fashion, I don't consider myself trendy).


Topshop playsuit

Jumpauits were the rage in the 70's and were also known as flying suits, catsuits, or rompersuits. Check out this vintage Butterick pattern!


They appeared again on the runways in 2008 but have continued to stay in fashion, and have filtered down the fashion pyramid to the masses. Most of the major pattern companies even offer jumpsuits and playsuits (check out Simplicity and Burda).

Chanel Resort 2008

Stella McCartney Pre-Fall 2010

Elie Tahari Fall 2010 RTW

Burda Style magazine May 2010

I admit that many designer styles are actually quite nice ( I LUUUUV the Eli Tahari design), but does anyone in the real world actually wear these? And do they suit any other body shape besides tall, thin, and waspy? Personally I haven't tried the look..although I have a narrow waist and hips I am only 5'3", and typically I cannot pull off wide leg, capri, or johdpur styles - they make me look short and dumpy. How popular are they where you live, and what do you think about them? Do you/would you wear one? Would you wear it/sew it if it was vintage?

01 June 2010

Ticked off the To Do List

Although it rained most of the day it warmed up a bit so I was finally able to get some photos in the garden! This is Butterick 5314 and Butterick's free pattern download for the Retro Tie Bag I wrote about here.


This is a modern pattern but I think it's got a retro vibe, don't you? I made the bag because the fabric is such a wonky colour (sometimes it looks more blue, sometimes more lavender) and I have had a horrible time trying to match accessories. The only thing I don't like is the self made belt..it isn't very secure but I'd never done it before so I figured I'd have a go, but I think in the future I will use a professional service. I think I must have lost some weight since I originally cut and fit it because the dress and belt feel a tad baggy. Other than that, it was sooo easy to make and could probably be done as a weekend project. I used embroidered linen with a cupro lining for both the dress and bag. This will be perfect for summer if we get some warm weather..*sigh* such is life in North Yorkshire!